
Pass around data between Shiny modules with R6
You have a nice shiny app that manipulates data based on user input, carries out some analysis, and displays the results back to the user. Great! Now it’s time to clean up some code, and break out the ui.R & server.R into modules. Uh-oh, all of a sudden, my app’s not working!
Does this sound familiar? It definitely happened to me countless of times. Today, I want to talk about an efficient way to modularize your Shiny app using R6.

Setup
Here’s a simple shiny app that takes 2 inputs from the user to manipulate the iris dataset, and generate a table and a graph. Notice the iris_dat reactive that manipulates the data.
library(shiny)
library(dplyr)
library(ggplot2)

ui <- fluidPage(
  numericInput("n_rows",
               "Number of rows to display",
               value = 10,
               min = 1,
               max = nrow(iris)),

  numericInput("multiplier",
               "A random calculation",
               value = 1,
               min = 1,
               max = 10),

  tableOutput("table"),
  plotOutput("graph")
)

server <- function(input, output, session) {

  iris_dat <- reactive(
    iris %>%
      head(input$n_rows) %>%
      mutate(Sepal.Length = Sepal.Length * input$multiplier)
  )

  output$table <- renderTable({
    iris_dat()
  })

  output$graph <- renderPlot({
    iris_dat() %>%
      ggplot(aes(Sepal.Length, Sepal.Width)) +
      geom_point()
  })
}

# shinyApp(ui, server)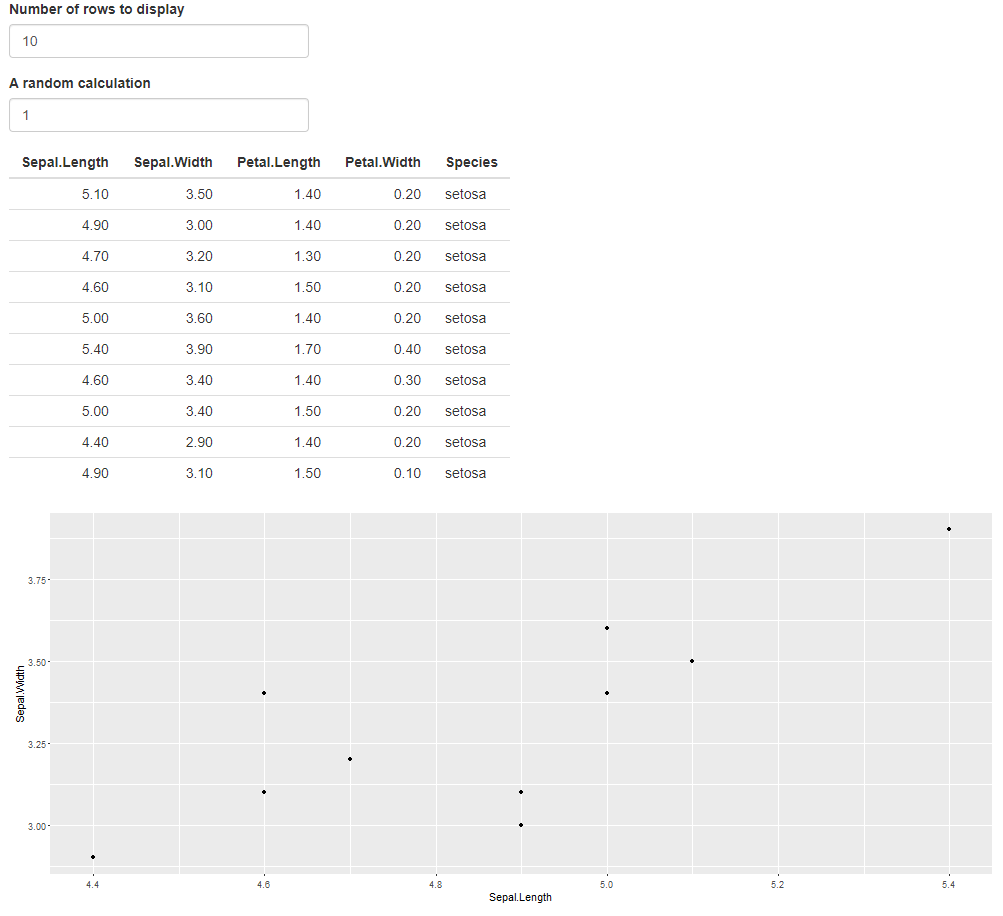
This app.R works. But you can imagine how long this file would get as you add more components.
Let’s see how they teach you to modularize your code.
Modularization - classic reactive
The above shiny app has 3 components.
- Taking input and manipulating data
- Generate table
- Generate graph
We’ll turn these components into their own modules.
- mod_manip.R
- mod_table.R
- mod_graph.R
mod_manip.R
- This module manipulates iris and returns the
iris_datreactive.
mod_manip_ui <- function(id) {
  ns <- NS(id)

  tagList(
    numericInput(ns("n_rows"),
                 "Number of rows to display",
                 value = 10,
                 min = 1,
                 max = 150),

    numericInput(ns("multiplier"),
                 "A random calculation",
                 value = 1,
                 min = 1,
                 max = 10)
  )
}

mod_manip_server <- function(id) {
  moduleServer(id, function(input, output, session) {

    iris_dat <- reactive(
      iris %>%
        head(input$n_rows) %>%
        mutate(Sepal.Length = Sepal.Length * input$multiplier)
    )

    return(iris_dat)
  })
}
mod_table.R
- This module takes a
datargument in the server, and displays it as a table in the UI. Notice we’re invokingdat(), as we would with any other reactive.
mod_table_ui <- function(id) {
  ns <- NS(id)
  tableOutput(ns("table"))
}

mod_table_server <- function(id, dat) {
  moduleServer(id, function(input, output, session) {

    output$table <- renderTable({
      dat()
    })

  })
}
mod_graph.R
- This is the same thing as
mod_table, but with a plot.
mod_graph_ui <- function(id) {
  ns <- NS(id)
  plotOutput(ns("graph"))
}

mod_graph_server <- function(id, dat) {
  moduleServer(id, function(input, output, session) {

    output$graph <- renderPlot({
      dat() %>%
        ggplot(aes(Sepal.Length, Sepal.Width)) +
        geom_point()
    })

  })
}
Putting these all together, our app.R now looks a lot more readable:
ui <- fluidPage(
  mod_manip_ui("mod_manip_1"),
  mod_table_ui("mod_table_1"),
  mod_graph_ui("mod_graph_1")
)

server <- function(session, input, output) {
  iris_dat <- mod_manip_server("mod_manip_1")
  mod_table_server("mod_table_1", dat = iris_dat)
  mod_graph_server("mod_graph_1", dat = iris_dat)
}

# shinyApp(ui, server)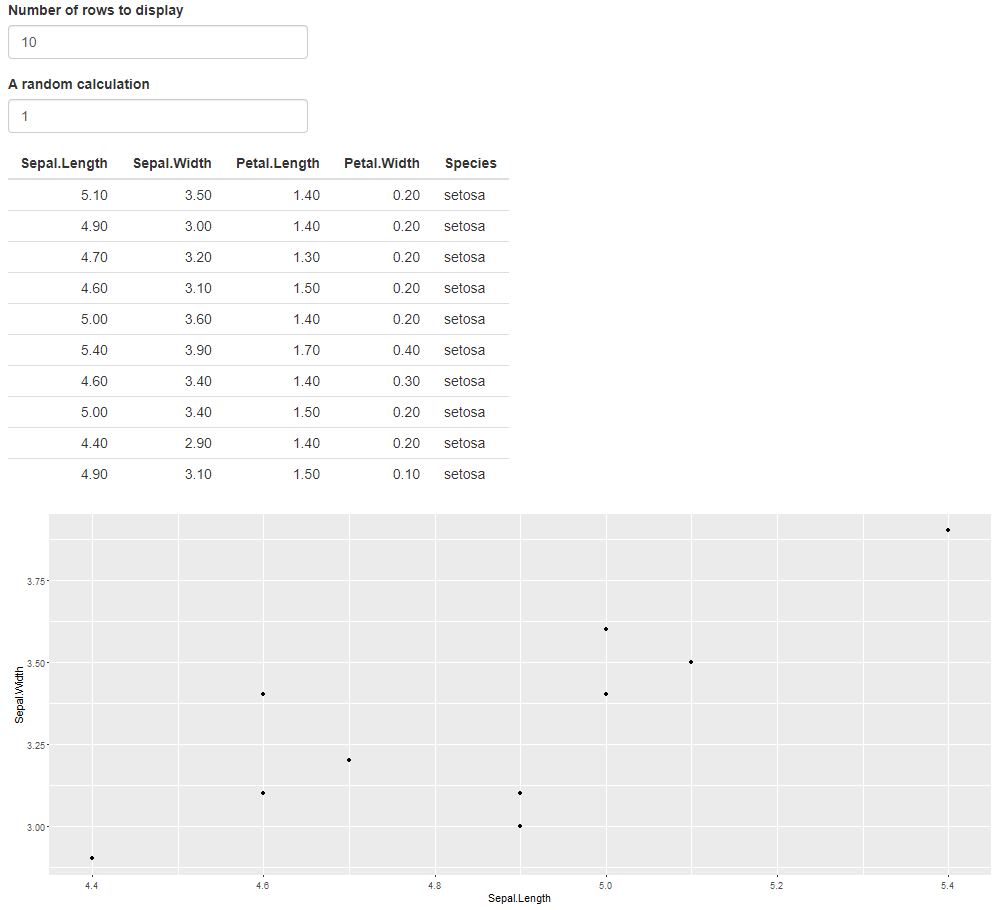
Great start! We now have 3 modules that each represent a component of our Shiny app. This app still works, because the reactivity chain is respected across modules.
You can definitely stop here and call it a day. But if you want to take it a little further, think about these points:
- If you want to access
input$multiplierinmod_table_server, how do you do it? - How do you make sure the
iris_datis calculated correctly, and passed correctly to other modules?
While these are definitely doable tasks, they require a little more work.
- Have
mod_manip_serverreturn two things, theinput$multipler, as well asiris_data.Then havemod_table_serverreceive another argumentmultiplier - Manually check the app, or use
shiny::testServerto test the server logic.
Buuuuuuuuuuuuuuuuut,
What if we used R6?
- Access the
multiplierpublic field in an R6 object, from anywhere! - Use
test_thatframework to test the logic automatically.
Modularization - R6

R6 is an object oriented programming system that can hold data and functions. It’s useful because when these data fields are modified inside a module, these modified values are available in the global environment. This means we can hold the entire data reading/manipulating/outputting process inside a single object, and interact with it from anywhere.
R6::R6Class is the only function you use. At minimum, it takes as arguments, the class name, and a list of information (data and functions), that can be read and written from anywhere.
ExampleR6 <- R6::R6Class(
  "ExampleR6",
  public = list(
    name = "Jiwan"
  )
)
You can create a new instance of this object, by :
example1 <- ExampleR6$new()
example1
## <ExampleR6>
## Public:
## clone: function (deep = FALSE)
## name: JiwanIgnore that “clone” thing, what’s important is that there’s a field named, “name”, with a value “Jiwan”.
You can interact with it like so:
example1$name <- "Not Jiwan"
example1
## <ExampleR6>
## Public:
## clone: function (deep = FALSE)
## name: Not JiwanThat’s about all you need to know. let’s dive straight into using this in Shiny modules.
R6 Example app
To use R6 in your modules, all you have to do is create an instance of the R6 object, and pass them to the desired modules’ server functions. Notice the r6 arguments in the 2 modules below.
mod_1 takes a text input from user, and when actionButton is pressed, it updates r6’s name field.
mod_1_ui <- function(id) {
  ns <- NS(id)

  tagList(
    textInput(ns("input_name"), "What's your name?"),
    actionButton(ns("go"), "Go!")
  )
}

mod_1_server <- function(id, r6) {
  moduleServer(id, function(input, output, session) {
    observeEvent(input$go, {
      r6$name <- input$input_name
      print(r6$name) # Print to console the r6's name field
    })
  })
}
mod_2 prints out the r6’s name field.
mod_2_ui <- function(id) {
  ns <- NS(id)

  textOutput(ns("output_name"))
}

mod_2_server <- function(id, r6) {
  moduleServer(id, function(input, output, session) {
    renderText(r6$name)
  })
}
Now if you run this Shiny app…
ui <- fluidPage(
  mod_1_ui("mod_1"),
  mod_2_ui("mod_2")
)

server <- function(session, input, output) {

  # Create an instance of the R6 class
  hello_r6 <- ExampleR6$new()

  # Pass the instance of R6 to the modules.
  mod_1_server("mod_1", r6 = hello_r6)
  mod_2_server("mod_2", r6 = hello_r6)
}

# shinyApp(ui, server)
It doesn’t work.
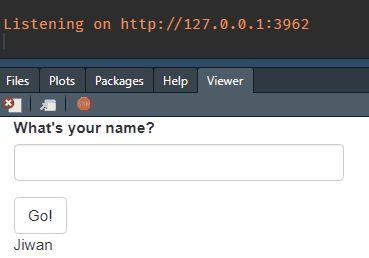
Why isn’t the textOutput updating, even though r6 is working (printing in the console correctly)?
Custom Reactivity
It’s because mod_2 has no idea that r6 is being updated, because the two modules are not connected by a reactivity.
This is when {gargoyle} comes in.
{gargoyle} has three main functions, init(), trigger(), watch(). The main idea is painfully clever. init sets a numeric reactiveVal to the session, trigger adds +1 to the reactiveVal, and watch listens to this event.
That’s literally it.
What’s good about this, is that we can control/set off the reactivity exactly when we want it, across modules.
The source code is really short, so you can just define those functions on your own if you don’t want another package dependency, like I’ve done in my most recent Shiny app.
Now, let’s re-visit the above example.
mod_1_ui <- function(id) {
  ns <- NS(id)

  tagList(
    textInput(ns("input_name"), "What's your name?"),
    actionButton(ns("go"), "Go!")
  )
}

mod_1_server <- function(id, r6) {
  moduleServer(id, function(input, output, session) {
    observeEvent(input$go, {
      r6$name <- input$input_name

      gargoyle::trigger("change_name") # Tell mod_2 to update, everytime input$go is clicked

      print(r6$name)
    })
  })
}
mod_2_ui <- function(id) {
ns <- NS(id)
textOutput(ns("output_name"))
}
mod_2_server <- function(id, r6) {
moduleServer(id, function(input, output, session) {
# watch for the trigger in from mod_1
observeEvent(gargoyle::watch("change_name"), {
renderText(r6$name)
})
})
}ui <- fluidPage(
mod_1_ui("mod_1"),
mod_2_ui("mod_2")
)
server <- function(session, input, output) {
second_r6 <- ExampleR6$new()
# Set up the initial trigger
gargoyle::init("change_name")
mod_1_server("mod_1", r6 = second_r6)
mod_2_server("mod_2", r6 = second_r6)
}
# shinyApp(ui, server)
Yay! It’s working!! 🎉 Pretty cool huh?
Please refer to Advanced R chapter, and Engineering Shiny chapter for the details I didn’t cover here.
Let’s dive back into the iris problem.
Implementation
Armed with this knowledge from above, our strategy to modularize the iris app is:
- Have all module server functions take as argument, an r6 object
- Modules interact directly with the r6
mod_manipupdates r6, and trigger reactive eventsmod_table&mod_graphlisten for changes, to retrieve data from r6 when needed
- Create an instance of the R6 class in server.R, and call all the modules with it
Here’s the R6 definition we’ll use for the iris app:
IrisR6 <- R6::R6Class(
  "IrisR6",
  public = list(
    n_rows = NULL,
    multiplier = NULL,
    orig_data = iris,
    res_data = NULL,
    manip_data = function(dat) {
      dat %>%
        head(self$n_rows) %>%
        mutate(Sepal.Length = Sepal.Length * self$multiplier)
    }
  )
)- The first three fields represent the components of
mod_manip, - The function
manip_datareplicates the data manipulating logic. We’ll call this frommod_manip - And we’ll save the resulting dataframe in to
res_datafield from the same module
mod_manip.R
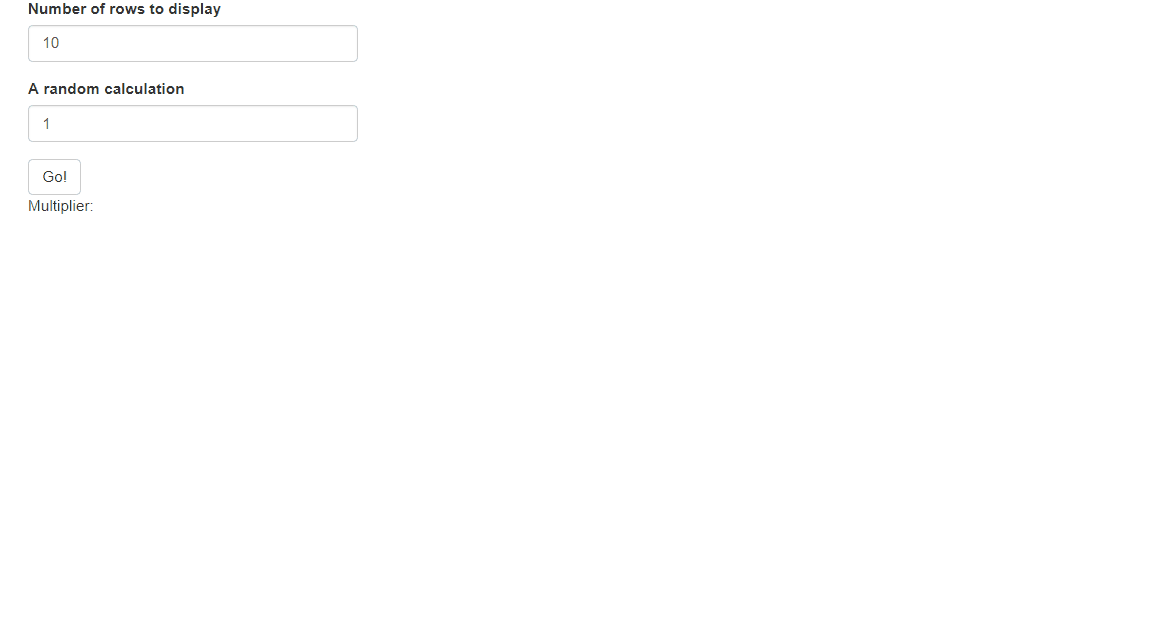
- Added an actionButton to the UI, to make it explicit when we want to update r6
- The server function now takes
r6as an argument, instead ofdat. - When “go” is pressed, we save the parameters to
r6, execute themanip_datafunction, and save the result into itself. - Trigger the “update_iris” event
mod_manip_ui <- function(id) {
  ns <- NS(id)

  tagList(
    numericInput(ns("n_rows"),
                 "Number of rows to display",
                 value = 10,
                 min = 1,
                 max = 150),

    numericInput(ns("multiplier"),
                 "A random calculation",
                 value = 1,
                 min = 1,
                 max = 10),
    actionButton(ns("go"), "Go!")
  )
}

mod_manip_server <- function(id, r6) {
  moduleServer(id, function(input, output, session) {

    observeEvent(input$go, {
      r6$n_rows <- input$n_rows
      r6$multiplier <- input$multiplier

      new_data <- r6$manip_data(dat = r6$orig_data)
      r6$res_data <- new_data

      gargoyle::trigger("update_iris")
    })

  })
}
mod_table.R
- The server function yet again takes
r6as argument, rather thandat - I added a textOutput in UI, to demonstrate we can get
input$multiplierfrom anywhere. - Watch for the “update_iris” event to update output
- Notice we’re not invoking
r6$res_datawith brackets.
mod_table_ui <- function(id) {
  ns <- NS(id)
  tagList(
    textOutput(ns("text")),
    tableOutput(ns("table"))
  )
}

mod_table_server <- function(id, r6) {
  moduleServer(id, function(input, output, session) {

    observeEvent(gargoyle::watch("update_iris"), {

      output$text <- renderText(paste("Multiplier:", r6$multiplier))

      output$table <- renderTable({
        req(!is.null(r6$res_data))

        r6$res_data
      })

    })
  })
}
mod_graph.R
- And more of the same thing.
mod_graph_ui <- function(id) {
  ns <- NS(id)
  plotOutput(ns("graph"))
}

mod_graph_server <- function(id, r6) {
  moduleServer(id, function(input, output, session) {

    observeEvent(gargoyle::watch("update_iris"), {

      output$graph <- renderPlot({
        req(!is.null(r6$res_data))

        r6$res_data %>%
          ggplot(aes(Sepal.Length, Sepal.Width)) +
          geom_point()
      })

    })
  })
}
ui & server
- I changed the ui layout a little, but nothing else changed.
- In server,
IrisR6$new()creates a new instance of the IrisR6 object. - This r6 object will be passed into the 3 modules.
- “update_iris” custom reactivity event is initialized.
ui <- fluidPage(
  column(12, mod_manip_ui("mod_manip_1")),
  column(6, mod_table_ui("mod_table_1")),
  column(6, mod_graph_ui("mod_graph_1"))
)

server <- function(session, input, output) {

  r6 <- IrisR6$new()
  gargoyle::init("update_iris")

  mod_manip_server("mod_manip_1", r6 = r6)
  mod_table_server("mod_table_1", r6 = r6)
  mod_graph_server("mod_graph_1", r6 = r6)
}

# shinyApp(ui, server)
And the app looks solid!
Bonus
Remember that test_that thing I brought up?
Because we’re not using reactivity, we can test the logic of this Shiny app, just like we would a regular function. This is great especially if your shiny app is built on top of {golem}. Here’s how a test-iris_shiny_app.R might look like (not executed cuz blog)
library(testthat)
test_that("Iris manipulation works in R6", {

  r6 <- MyR6$new()

  r6$n_rows <- 5
  r6$multiplier <- 10
  new_data <- r6$manip_data(dat = r6$orig_data)
  r6$res_data <- new_data

  espect_equal(nrow(r6$res_data), 5)
  espect_equal(max(r6$res_data$Sepal.Length), 79)
})
Summary
There you have it! I hope you learned something from this blog post :)
For a small shiny app, this may be an overkill, but if you have a shiny app that does a lot of data processing, I recommend using this approach, rather than juggling through that logic in you modules, and having to keep track of it everywhere.
In this blog post, we learned:
- Do modularize your shiny app!
- Basics of R6 in Shiny
- Custom reactive event with {gargoyle}